

If you’re looking for a reliable WordPress hosting solution and want professional help getting everything set up, Wordify is one managed WordPress host I recommend to my clients. The process is straightforward: you’ll sign up for a Wordify account and add me as a Team Member so I can handle the technical setup for you.
Step-by-Step Instructions
1. Access Wordify
Visit https://www.websitevalet.com/wordify to get started.
2. Create Your Account
Click the “Sign Up” button at the top of the page and complete the registration form. Important: Check your email immediately after signing up—you’ll need to click the verification link to activate your account.
3. Add Payment Information
Once you’re logged into the Wordify Dashboard, navigate to “Billing” in the menu and add your credit card information to activate your hosting plan.
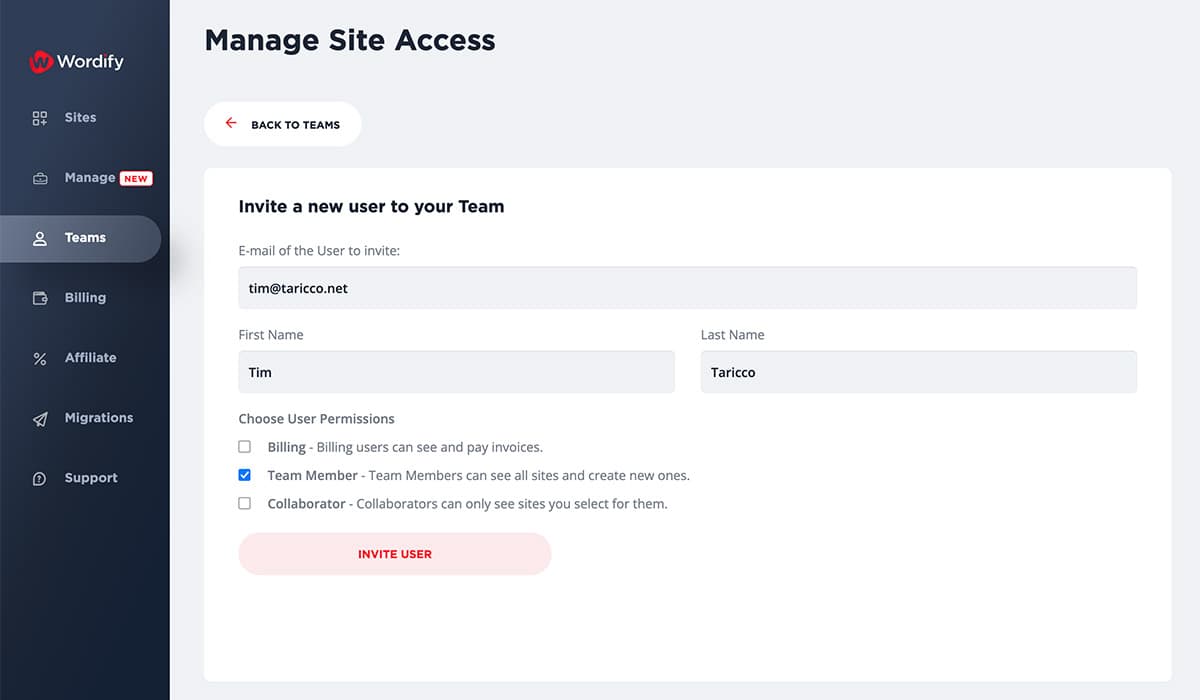
4. Invite Me as a Team Member
This is the key step that allows me to help you:
- Go to “Teams” in the dashboard menu
- Click “Invite New User”
- Enter my details:
- Name: Tim Taricco
- Email: tim@taricco.net
- Choose “Team Member” access
- Click “Invite User”
5. Setup Complete
Once I accept the team invitation, I’ll have the access needed to configure your WordPress hosting environment and get your website up and running.
That’s it! With these steps completed, I can handle all the technical aspects of setting up your managed WordPress hosting while you focus on your business.